Setting up R on macOS 10.15 Catalina (Complete Guide)
This guide is intended to be a complete guide to setting up R (free desktop version) on a clean macOS Catalina installation. It shows how to get R, the R App and R Studio to all use the same R packages, as well as how to ensure installation of pre-built binary packages from CRAN when possible, or to otherwise build from C/C++, and Fortran source with OpenMP support.
Motivation
If you’re not careful how you install R on macOS, when you try to install R packages, R may try to build those packages from source. We like our package managers. They usually make finding and installing software a cinch. On macOS, the two most popular ones are MacPorts and Homebrew (a.k.a. brew). In this post, I’ll be using brew – partially. If you’re already a brew fan and have had to install R, you most like did so with brew install r. This is probably the wrong choice for most people as this could prevent R from using pre-built binaries when installing packages.
Installing R packages from source can take a long time and there’s usually no advantage to doing so. Even if you force the R package installer to install the binary package instead of building it from source, these binary packages may expect R itself to be installed in a specific location and won’t work if they can’t find and link to the R framework.
Moreover, unless you know what you’re doing, you’ll likely not build the package correctly for optimal speed and performance. If you’re building from source and require optimal performance, you’ll have to spend some time profiling your builds to ensure they are getting built optimally.
Background
R is built from C, Fortran and recursively from R source code itself. CRAN (Comprehensive R Archive Network) is the main repository for R packages from which you will install most of the packages you need. Packages hosted on CRAN include pre-built binary packages targeted for Windows and macOS. If you use a version of R that was built by CRAN, it will be able to download and install the pre-built binaries “out of the box” without having to build them from source.
You may still need to build from source from time to time, so I’ll also cover how to set up LLVM and GNU Fortran with OpenMP support. Even though the macOS Command Line Tools from Apple includes an LLVM compiler, there is still no support for OpenMP, so we’ll need to install our own version (via brew).
Installing R
- Visit cran.r-project.org
- From the menu on the left panel, select Mirrors
- Select the site closest to you
- In the main section, select Download R for (Mac) OS X
- Find the latest package. It will be named something similar to
R-3.6.0.pkgaccording to the latest version available.
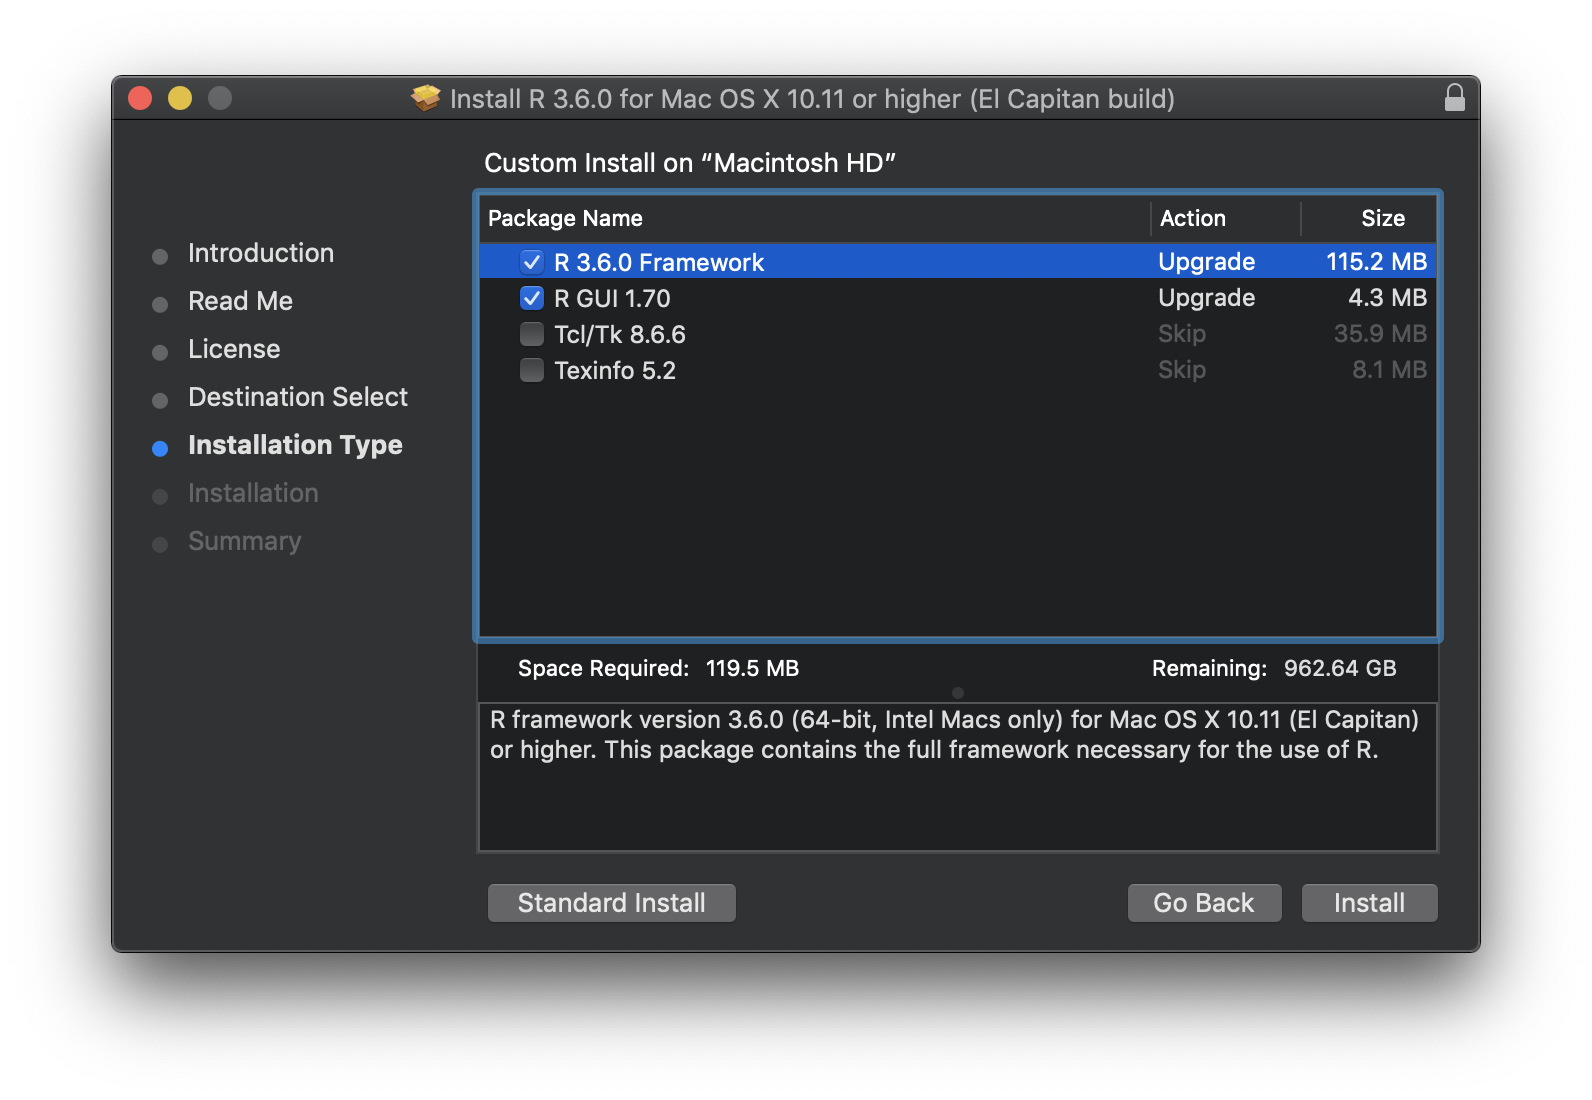
This package contains the following:
- R Framework
- R GUI
- Tcl/Tk
- Texinfo
You absolutely need R Framework. This will be installed in /Library/Frameworks where pre-built binaries will look for it, if needed. This is why you need to install this version of R in order to make use of pre-built packages.
R GUI is a terminal-like environment created specifically for R. If you will be using R Studio (highly recommended), you won’t use R GUI very much. If you want to access R from a terminal session instead of the R GUI, stay tuned; this will be covered too.
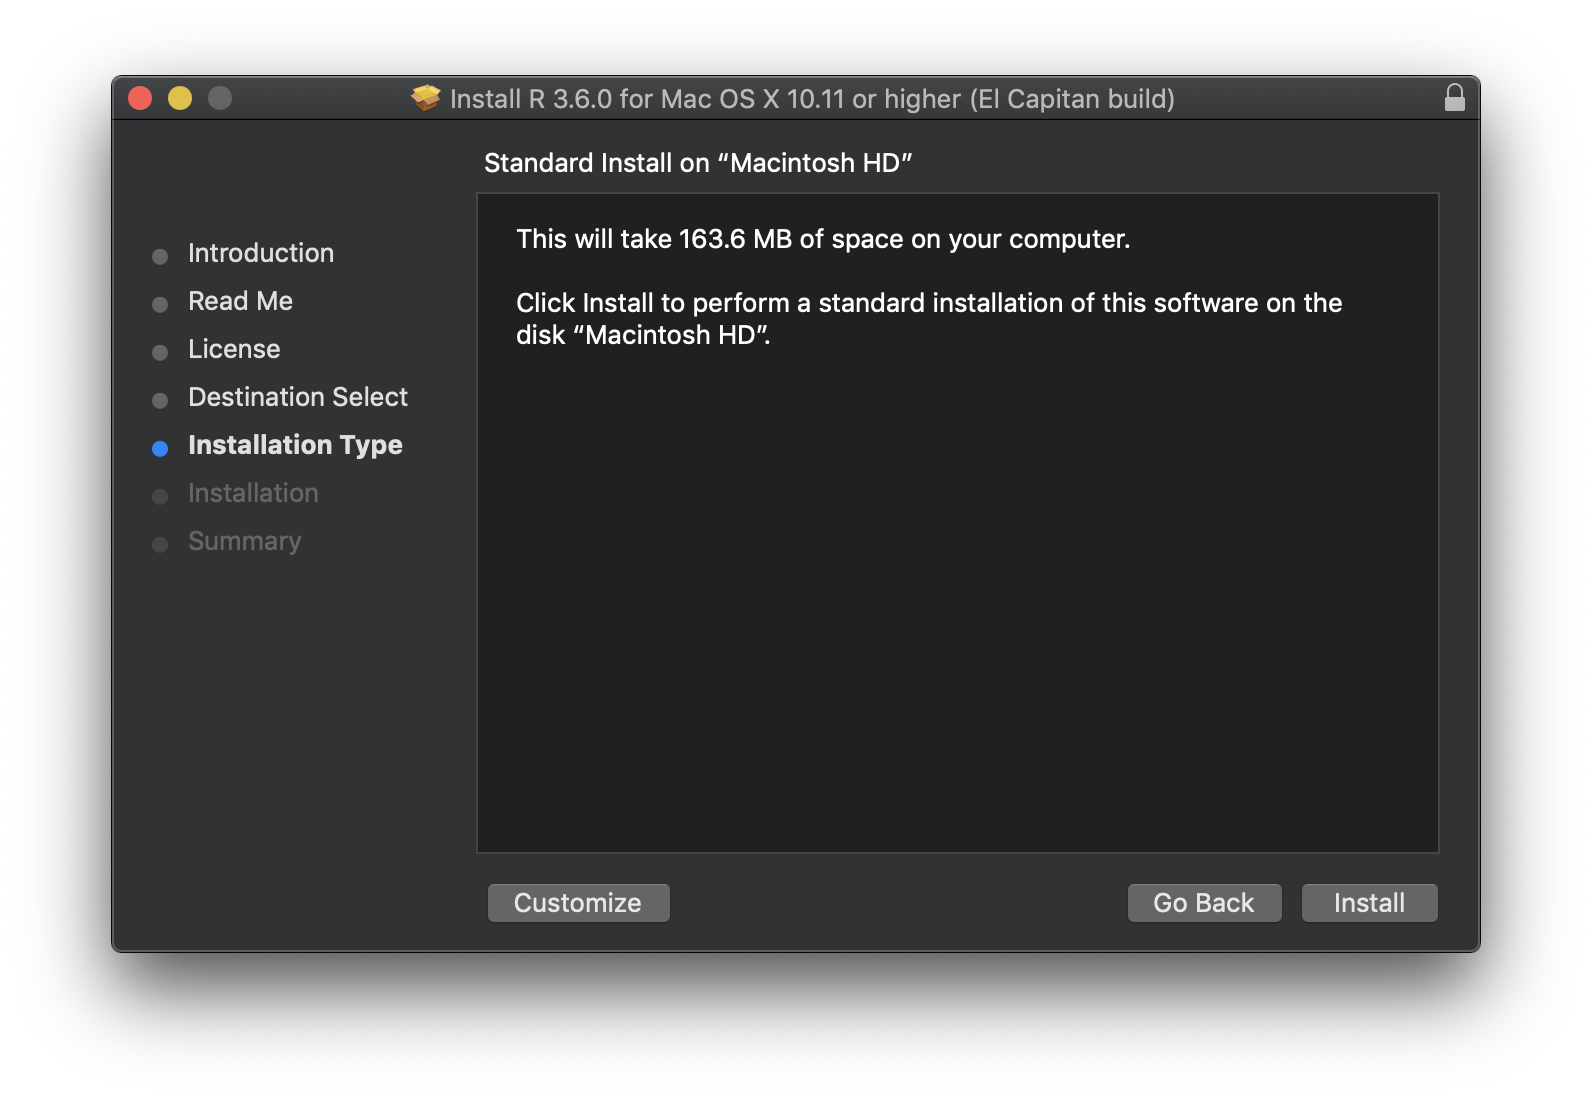
Kick off the installation process by opening the package you just downloaded. When you get to the Installation Type make sure you select Customize.
2020-05-02 UPDATE: If you need Tck/Tk and/or Texinfo support, it seems that you must install those options with this R installation software. As far as I can tell, the paths to these libraries are configured during the building of the software package and there doesn’t seem to be a feasible way to change these paths without rebuilding the software. If I find out otherwise, I’ll revise this update. If you don’t know what these libraries are for, you probably don’t need them in which case, feel free to not install them.
IMPORTANT: You should NOT install Tcl/Tk and Texinfo if you plan on using These packages are installed to brew as your package manager./usr/local and brew doctor (the diagnostics options that checks the validity of your brew installation) will complain about this. We will install these two packages via brew instead.
R 3.6.0 binary for OS X 10.11 (El Capitan) and higher, signed package. Contains R 3.6.0 framework, R.app GUI 1.70 in 64-bit for Intel Macs, Tcl/Tk 8.6.6 X11 libraries and Texinfo 5.2. The latter two components are optional and can be ommitted when choosing “custom install”, they are only needed if you want to use the tcltk R package or build package documentation from sources.
Set some defaults
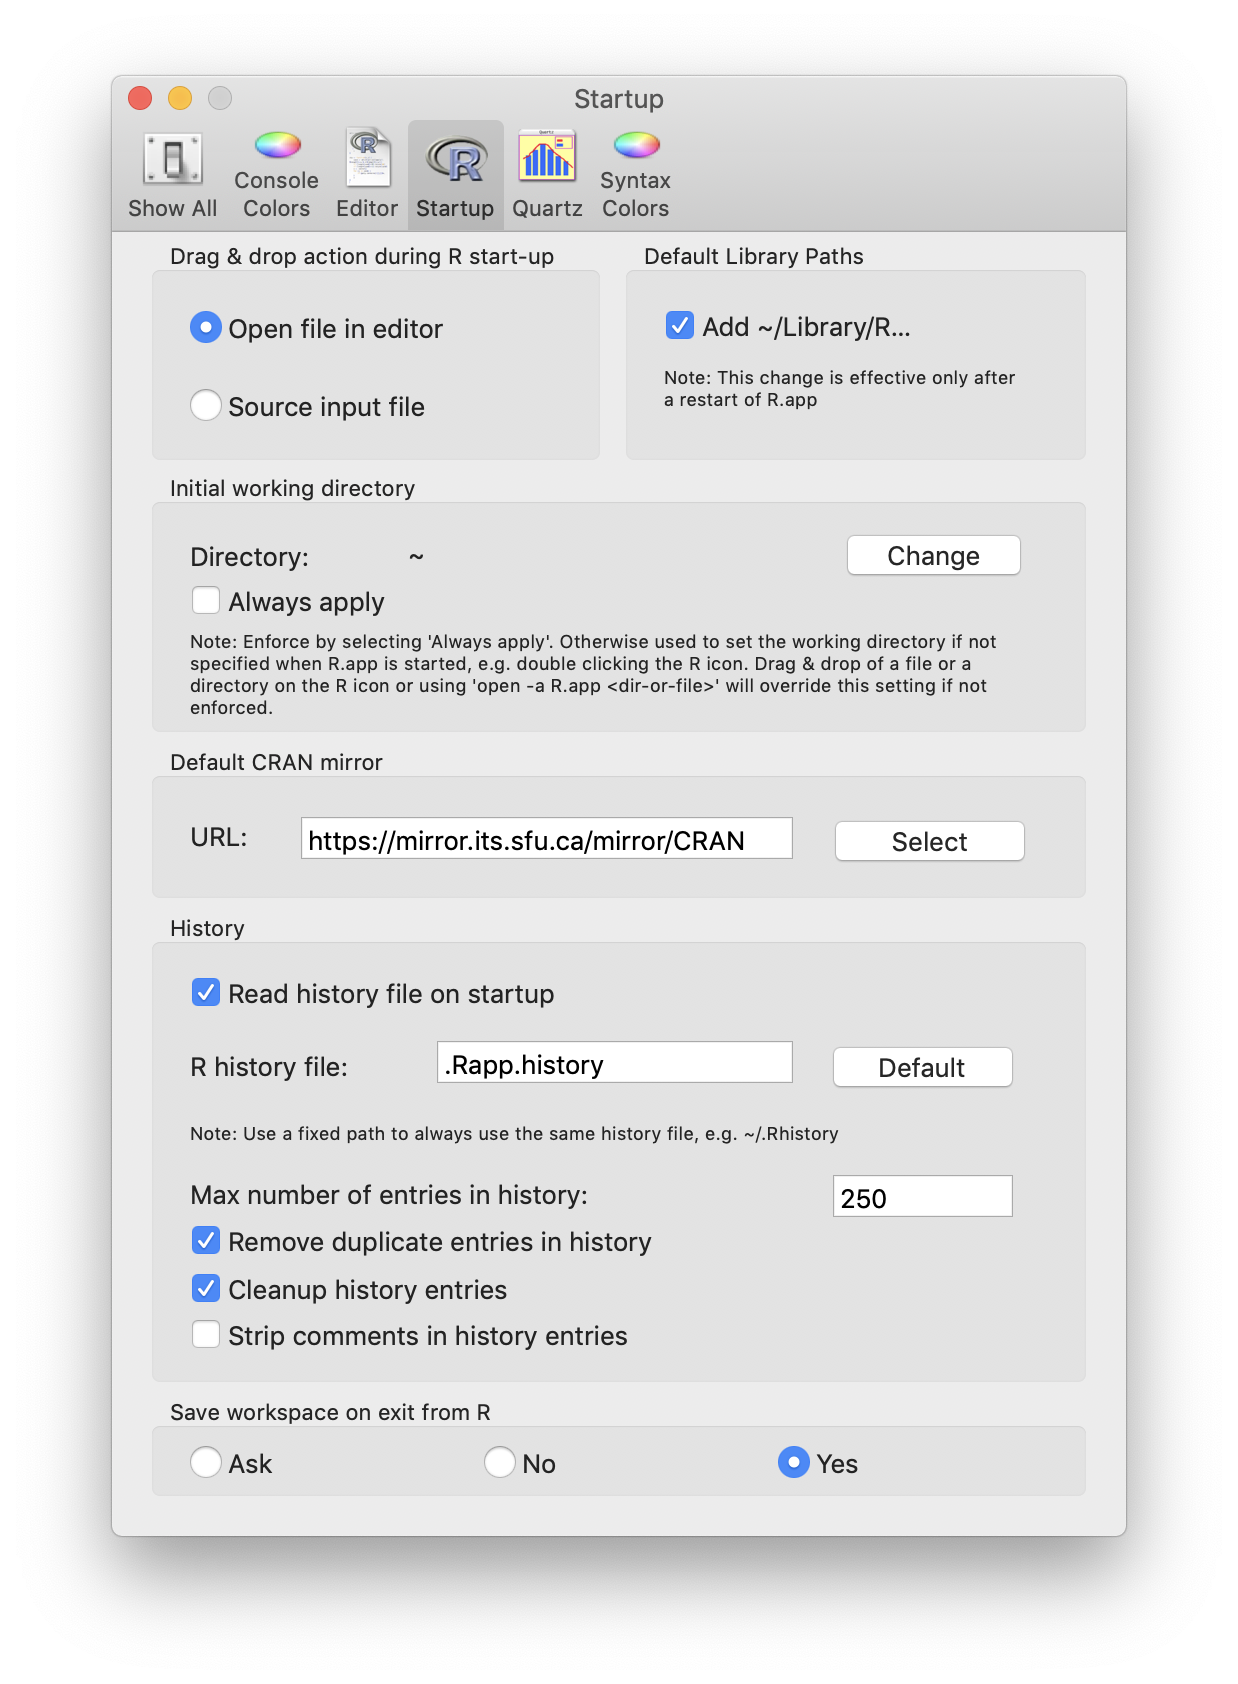
Before you start installing packages, you should think about where you will be saving all these packages as well as which CRAN mirror site you’ll be downloading from.
-
Default Library Paths - By default, packages you install will be saved to
/Library/Frameworks/R/...and down a few more subfolders that you’ll never remember! Also, if you ever have to do a clean reinstall of the R Framework, you’ll have to reinstall all your packages too. I recommend you change this default. -
You should determine which CRAN mirror site is physically closest to you. This will improve your download times. If you don’t set a default site, R will ask you to select one every time you want to install a package. Alternatively, you can select
0-Cloud [https]which redirects you automatically to an appropriate site. Select[https]over[http]when you have a choice.
0-Cloud
https://cloud.r-project.org/
Automatic redirection to servers worldwide, currently sponsored by Rstudio
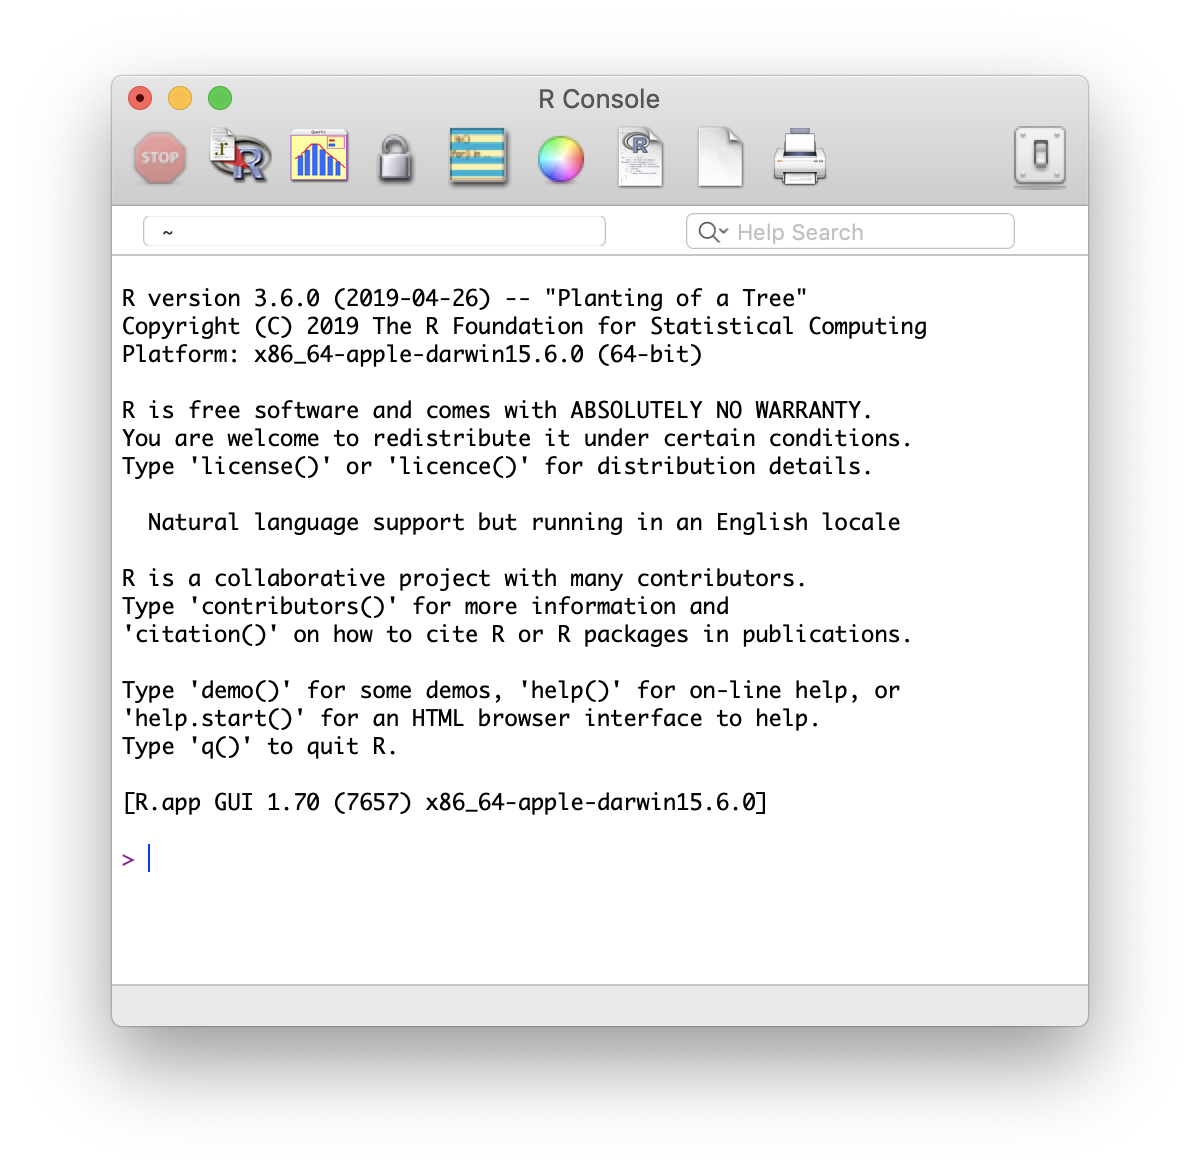
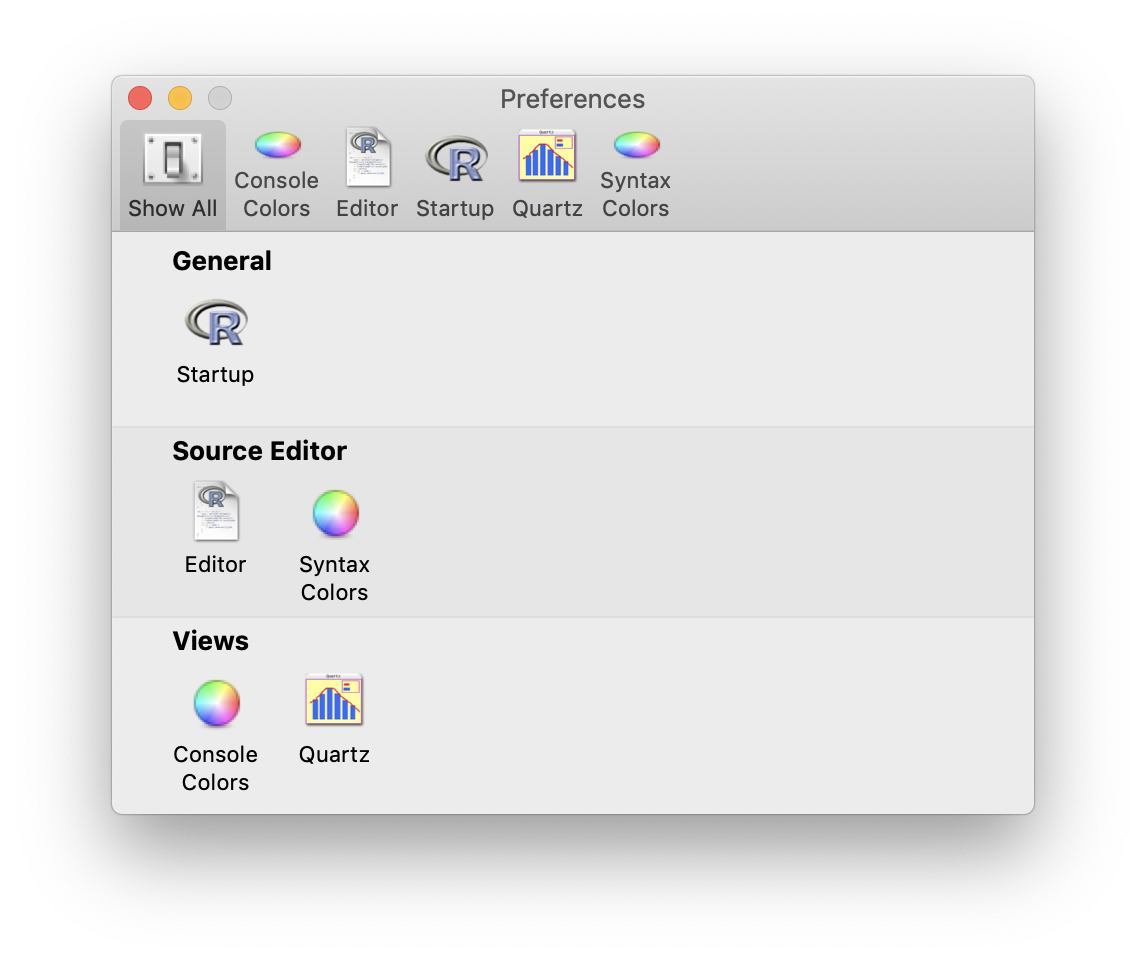
R App
Terminal
If accessing R from the terminal, the setup for these two options can be done in ~/.Rprofile. If this file doesn’t exist, create it and add the following lines:
# Default CRAN mirror
options(repos=structure(c(CRAN="https://cloud.r-project.org/")))

# Default library path
.libPaths(c("/Users/<username>/Library/R/<r-version>/library"))
NB:
- I’ve set the CRAN mirror to be selected automatically but you can change the URL to a specific mirror if you wish
- For the library path, replace
<username>with your account username and<r-version>with the version of R you installed (I installed3.6) - You can use any path you want for the default library path but since the R App forces you to use this one, you might want to stick with it if you’re using R via both the R app and the terminal.
- Upon restarting the R app, this directory will be created if it doesn’t exist
- On some R installations, if you want to preserve the system library path, you’ll need to re-include it using
.libPaths(). For example:
# Default library path
.libPaths(c("/Users/<username>/Library/R/<r-version>/library", .libPaths()))
If you are not using the R app, you will need to make sure that the path you specify exists. For example,
mkdir -p ~/Library/R/3.6/library
R from your zsh shell
If you are using the zsh shell, r may already be reserved for re-running your last command. Since you can also do this with !! or by scrolling back through your history with the up-arrow key, you can disable this functionality and use it to launch R. In your ~/.zshrc file:
disable r
alias r="/Library/Frameworks/R.framework/Versions/Current/Resources/bin/R"
alias R=r
Now you can use both r and R to invoke R.
Homebrew & Xcode Command Line Tools
From this point, you should be able to use brew to install almost everything else. You can find installation instructions on the official site.
Installing Homebrew will also install the Xcode Command Line Tools if not already installed. If you already have Homebrew installed and are not sure if the Xcode Command Line Tools are installed, you can try to install them now. If already installed, you’ll simply get an error message telling you they are already installed.
sudo xcode-select --install
Tcl-tk and Texinfo
2020-05-02 UPDATE: Installed this way, the tcl-tk package is not automatically found by R. If you want Tcl/Tk support, you should include it with the base R installation software. You’ll just have to live with the
brew doctorwarnings.
These are the two packages we ommitted during the R installation so that they didn’t conflict with Homebrew. We now install them via brew.
brew install tcl-tk texinfo
SDK Header Files, LLVM & GCC
There are times when you’ll want to or need to build from source. For instance, if you’re installing from a repository whose package only has source code, or if the source code is more recent than the binary version, R (by default) will build from source.
SDK Header Files
2020-05-01 UPDATE: I no longer recommend exporting paths to the SDK header files for the purpose of building R packages, as I’ve experienced some side effects in the past and had to remove them from my own setup. The path to the SDK is now also configured in
Makevars(see further down in this article).
Even though both Xcode and the Command Line Tools are installed, some build systems still have trouble locating the macOS SDK header files. They expect system header files to be located in /usr/include. However, both Xcode and the Command Line Tools install them elsewhere. Apple used to provide a separate installation package (as part of the Xcode installation) that would install these SDK header files in /usr/include. However, Apple no longer provides this package.
Instead, you can set the correct path to the SDK header files by including something like this in your ~/.bash_profile (if you use bash) or ~/.zshrc file (if you use zsh). Note that Catalina’s default shell is now Zsh.
XCBASE=`xcrun --show-sdk-path`
export C_INCLUDE_PATH=$XCBASE/usr/include
export CPLUS_INCLUDE_PATH=$XCBASE/usr/include
export LIBRARY_PATH=$XCBASE/usr/lib
This will not take effect in your current terminal session. However, you should be able to restart your session with source $SHELL or by specifying the precise path to your shell’s binary executable (e.g.: source /bin/zsh).
LLVM
The Apple-supplied version of the LLVM compiler (clang) doesn’t include support for OpenMP. Install the latest from brew:
$ brew install llvm libomp
Test OpenMP
Now test your installation against OpenMP. Your shell’s environment should be configured to find the macOS SDK header files. Create a file called omptest.c:
#include <stdlib.h>
#include <stdio.h>
#include <omp.h>

int main() {
  #pragma omp parallel num_threads(4)
  {
    printf("Hello from thread %d, nthreads %d\n", omp_get_thread_num(), omp_get_num_threads());
  }
  return EXIT_SUCCESS;
}
Then try to build and run it:
$ LLVMBASE=`brew --prefix llvm`
$ $LLVMBASE/bin/clang -fopenmp -L$LLVMBASE/lib omptest.c -o omptest
$ ./omptest

Hello from thread 3, nthreads 4
Hello from thread 0, nthreads 4
Hello from thread 2, nthreads 4
Hello from thread 1, nthreads 4
GCC
The GNU compiler collection includes gfortran which is sometimes needed. Install gcc without multilib (cross platform) support so that openmp support is possible.
$ brew install gcc --without-multilib
You no longer need to include --without-multilib on 64-bit-only systems as it is automatically disabled but it doesn’t hurt to add it.
Configure R to use LLVM & GCC
To configure R to build packages with the versions of clang and gcc you just installed, set up a Makevars file. This must be located at ~/.R/Makevars. I’ve crafted this file from Internet research and some trial & error and have included some reference links in case you’re interested.
C/C++
Now, try building from R. A good test is the data.table package. Uninstall it first, if it’s already installed.
remove.packages("data.table")
Then, install it from source:
install.packages("data.table", type = "source")
If R installs it without error, you are set up to build C/C++ source code with OpenMP support. However, you should reinstall this package from the CRAN binaries unless you have a good reason against, so that you get optimal performance.
Fortran
You can also test to make sure your configuration can build Fortran code against the OpenMP libraries by installing an appropriate R package, e.g.: bayesQR.
> install.packages("bayesQR", type = "source")
Installing package into ‘/Users/ryan/Library/R/3.6/library’
(as ‘lib’ is unspecified)
trying URL 'https://mirror.its.sfu.ca/mirror/CRAN/src/contrib/bayesQR_2.3.tar.gz'
Content type 'application/x-gzip' length 34011 bytes (33 KB)
==================================================
downloaded 33 KB

* installing *source* package ‘bayesQR’ ...
** package ‘bayesQR’ successfully unpacked and MD5 sums checked
** using staged installation
** libs
/usr/local/opt/gcc/bin/gfortran  -fPIC  -Wall -g -O2  -fopenmp -c  QRb_AL_mcmc.f95 -o QRb_AL_mcmc.o
/usr/local/opt/gcc/bin/gfortran  -fPIC  -Wall -g -O2  -fopenmp -c  QRb_mcmc.f95 -o QRb_mcmc.o
/usr/local/opt/gcc/bin/gfortran  -fPIC  -Wall -g -O2  -fopenmp -c  QRc_AL_mcmc.f95 -o QRc_AL_mcmc.o
/usr/local/opt/gcc/bin/gfortran  -fPIC  -Wall -g -O2  -fopenmp -c  QRc_mcmc.f95 -o QRc_mcmc.o
/usr/local/opt/gcc/bin/gfortran  -fPIC  -Wall -g -O2  -fopenmp -c  setseed.f95 -o setseed.o
/usr/local/opt/llvm/bin/clang -dynamiclib -Wl,-headerpad_max_install_names -undefined dynamic_lookup -single_module -multiply_defined suppress -L/Library/Frameworks/R.framework/Resources/lib -L /usr/local/opt/llvm/lib -L /usr/local/opt/gettext/lib -L /Applications/Xcode.app/Contents/Developer/Platforms/MacOSX.platform/Developer/SDKs/MacOSX.sdk/usr/lib -o bayesQR.so QRb_AL_mcmc.o QRb_mcmc.o QRc_AL_mcmc.o QRc_mcmc.o setseed.o -L/Library/Frameworks/R.framework/Resources/lib -lRlapack -L/Library/Frameworks/R.framework/Resources/lib -lRblas -L/usr/local/opt/gcc/lib/gcc/9/ -lm -L/usr/local/opt/gcc/lib/gcc/9/ -lm -F/Library/Frameworks/R.framework/.. -framework R -Wl,-framework -Wl,CoreFoundation
installing to /Users/ryan/Library/R/3.6/library/00LOCK-bayesQR/00new/bayesQR/libs
** R
** data
** inst
** byte-compile and prepare package for lazy loading
** help
*** installing help indices
** building package indices
** testing if installed package can be loaded from temporary location
** checking absolute paths in shared objects and dynamic libraries
** testing if installed package can be loaded from final location
** testing if installed package keeps a record of temporary installation path
* DONE (bayesQR)

The downloaded source packages are in
  ‘/private/var/folders/lh/llhz03f121l_0hns2j1d9jj00000gn/T/RtmpqTk4No/downloaded_packages’
If all goes well, your setup is properly configured to build from Fortran source code with OpenMP support.
Install R Studio
R Studio is available as a Homebrew cask. However, it requires the R cask to be installed. We avoided installing R this way because it doesn’t allow a custom installation and can’t install pre-build binary packages from CRAN. I therefore recommend installing R Studio by downloading the installer from rstudio.com.
XQuartz & X11
It is possible to get X11-related warnings or erros when installing packages or loading other R libraries.
Warning message:
In doTryCatch(return(expr), name, parentenv, handler) :
  unable to load shared object '/Library/Frameworks/R.framework/Resources/modules//R_X11.so':
  dlopen(/Library/Frameworks/R.framework/Resources/modules//R_X11.so, 6): Library not loaded: /opt/X11/lib/libSM.6.dylib
  Referenced from: /Library/Frameworks/R.framework/Resources/modules//R_X11.so
  Reason: image not found
If at any point you need to install X11:
brew cask install xquartz
Time Machine
I find it unnecessary to back up installed packages to Time Machine, both from brew and R. In the event of a system restore, these packages are very easy to re-install. You can add the following exclusions to Time Machine, either via the Time Machine GUI settings or from the command line:
$ sudo tmutil -p addexclusion /Users/<username>/Library/R/3.6/library
$ sudo tmutil -p addexclusion /usr/local
